After our inaugural 4 month trip, the strategy proved to be correct, with one small exception. On travel days, away from electric hookup, the Tropicool coolbox struggled to keep things cool all day. Especially if we stopped off for a few hours to sight-see. So as part of the winter upgrade, I splashed out on a new Waeco CRP40 compressor fridge, which meant that I needed the leisure battery after all.
I had considered putting the battery behind the drivers seat, and reducing the size of the water container. For safety reasons, this would mean using an AGM battery. After spending a lot of time reading about various batteries, I came to the conclusion that a deep cycle flooded lead acid battery would be best. So I settled on 80AH Banner Energy Bull - which is the largest size I can fit in. Although the battery is spec as 80AH, I'll not get anything like that out of it. During use it should not really be discharged below 50% - and when its charging everything slows down after about 80%. So I reckon that you can only rely on about 25AH being available. It's a pessimistic view but it should let me run the fridge for a day while stationary & in overcast weather.
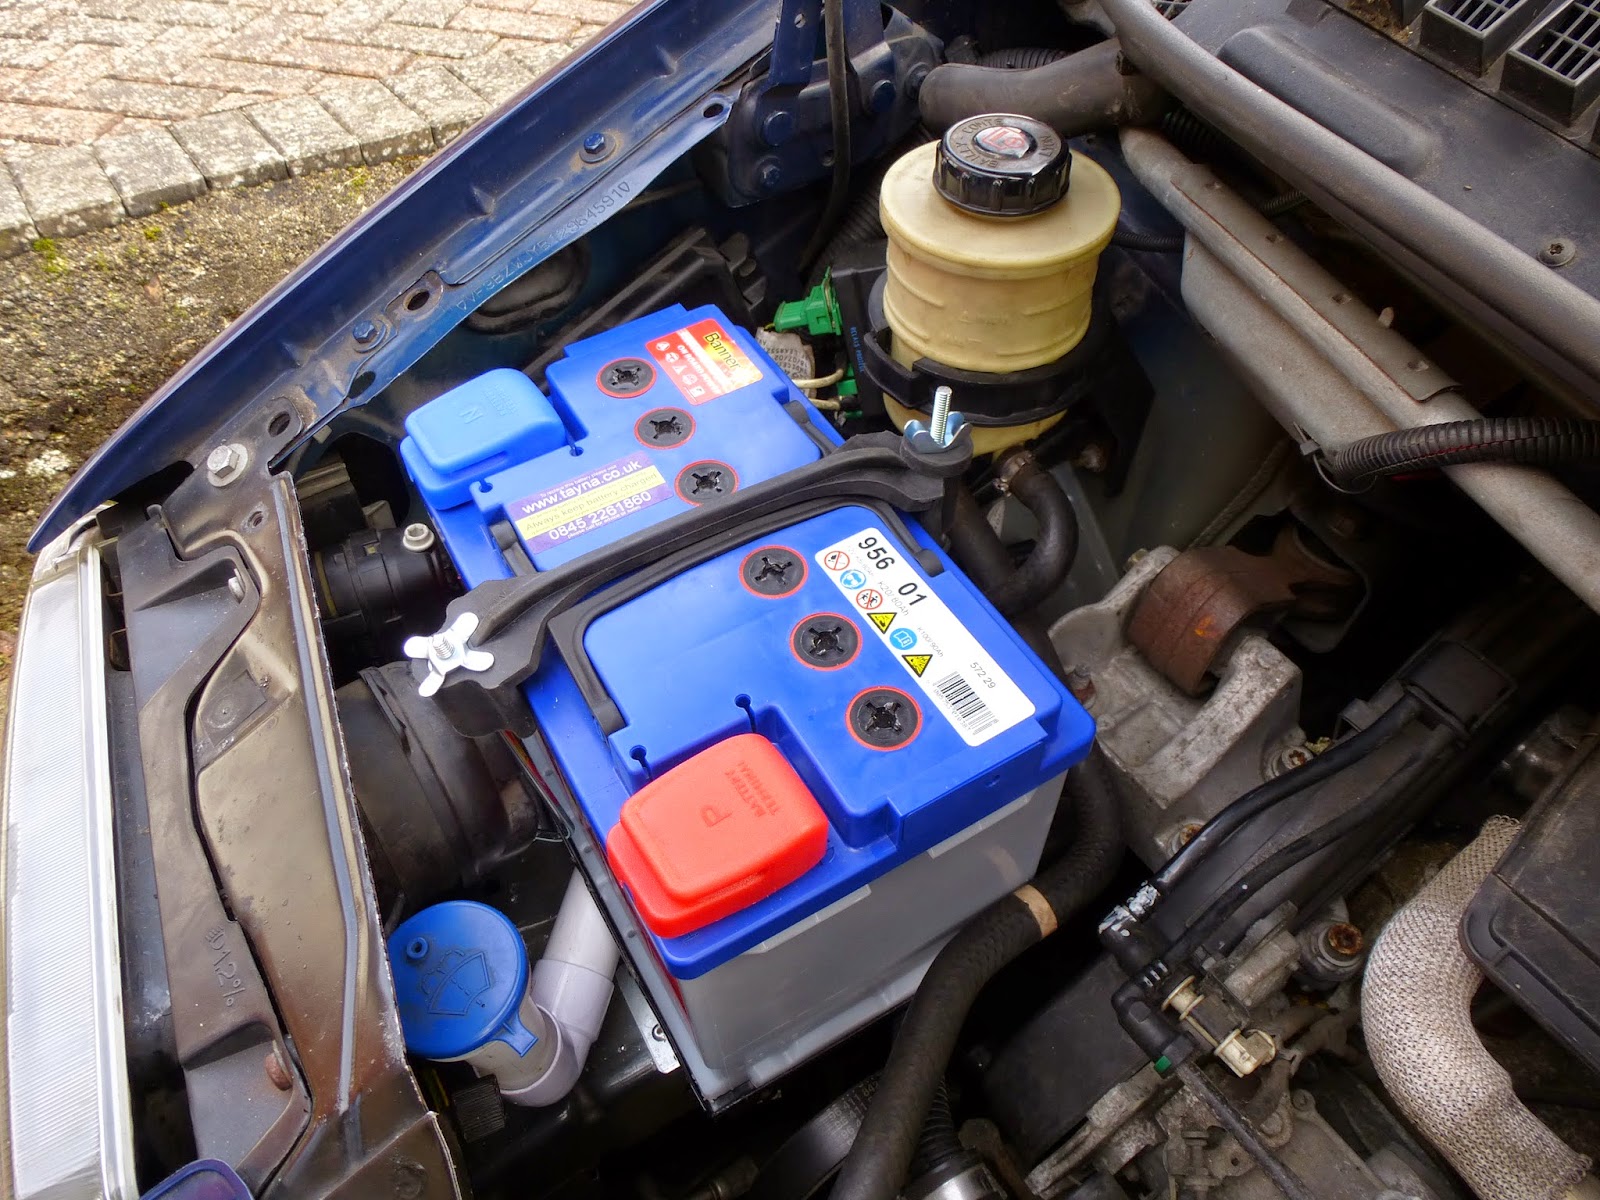
This meant that I had to mount the battery in a ventilated area. I knew that some people had already put a battery in the engine bay, so this is where I put it .
http://cornishben.smugmug.com/General/The-Van-Conversion/i-ft6ZTGk
http://www.soapy.freeola.com/campervan/joblist.html#E (pictures are broken)
This is the area where the battery is going to go

The glow plug relay bracket, to the left of the water filler was removed. The relays were eventually mounted up behind the power steering filler bottle.
The water filler was sawn off, and some 32mm FloPlast ABS solvent waste pipe (B&Q) fitted perfectly.

To secure the battery I found this 7" x 11" battery tray, which is ideal for a 096 battery.

To level up the battery the bracket legs are different heights - so a little trial and error using wooden blocks, to end up with right heights (almost). Bending with just a vice and a club hammer made it a very slow job.

Brackets fitted using pop rivets - not ideal, but there was no access to the other side. The top of the brackets are pretty much flush with the top of the plastic pipe. This also gives enough room for the power steering hoses - though I ended up moving the hose behind the cable harness (green stripe)

Battery tray in place, bolted to the brackets

Battery fitted. I opted for a rubber clamp, since I though it may be lower profile than a metal one. The wing nut at the front had to be flattened, so that there was enough room to close the bonnet.
This battery is 278L x 175W x 190H and there is very little room to spare.
that looks brilliat - great idea
ReplyDelete